High Protein Nutrition Plan for 7 Days
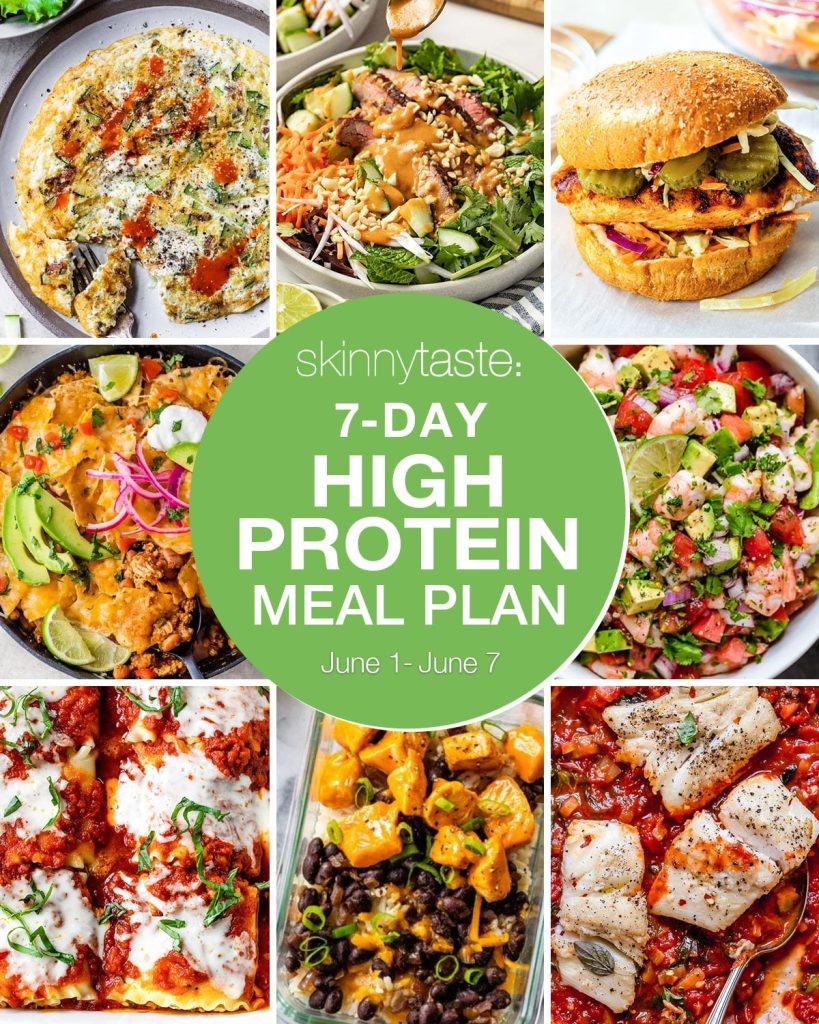
**7-Day High Protein Meal Plan**
A high-protein meal plan can effectively aid in muscle development, weight management, and overall well-being. Proteins are vital macronutrients that assist in tissue formation and repair, enzyme and hormone synthesis, and immune system support. Below is a 7-day high-protein meal plan curated to offer you healthy and mouthwatering meals abundant in protein.
**Day 1:**
– **Breakfast:** Eggs scrambled with spinach and feta cheese, accompanied by a side of smoked salmon.
– **Lunch:** Salad of grilled chicken breast with mixed greens, cherry tomatoes, cucumber, and balsamic vinaigrette.
– **Dinner:** Cod baked with a lemon herb crust, complemented by quinoa and steamed broccoli.
– **Snack:** Greek yogurt paired with almonds and berries.
**Day 2:**
– **Breakfast:** Smoothie packed with whey protein, banana, almond milk, and a tablespoon of peanut butter.
– **Lunch:** Wrap with turkey and avocado using a whole grain tortilla, lettuce, and tomato.
– **Dinner:** Beef stir-fry featuring bell peppers, broccoli, and snap peas served atop brown rice.
– **Snack:** Cottage cheese with chunks of pineapple.
**Day 3:**
– **Breakfast:** Omelet filled with mushrooms, bell peppers, and cheddar cheese.
– **Lunch:** Lentil soup containing diced chicken served with whole-grain bread on the side.
– **Dinner:** Salmon grilled with asparagus alongside a quinoa salad.
– **Snack:** Hard-boiled eggs.
**Day 4:**
– **Breakfast:** Overnight oats mixed with chia seeds, protein powder, and assorted berries.
– **Lunch:** Chickpea tuna salad with red onion and lemon-tahini dressing.
– **Dinner:** Pork tenderloin served with roasted sweet potatoes and green beans.
– **Snack:** Edamame.
**Day 5:**
– **Breakfast:** Whole grain toast topped with avocado and poached eggs.
– **Lunch:** Salad of quinoa and black beans mixed with corn, cilantro, and lime dressing.
– **Dinner:** Chicken stir-fry featuring cashews, snow peas, and carrots served over jasmine rice.
– **Snack:** Protein bar.
**Day 6:**
– **Breakfast:** Pancakes made with protein powder, topped with fresh fruit and a scoop of Greek yogurt.
– **Lunch:** Salad of shrimp and avocado with mixed greens and a citrus vinaigrette.
– **Dinner:** Turkey meatballs in marinara sauce served with whole wheat spaghetti.
– **Snack:** Hummus alongside carrot and celery sticks.
**Day 7:**
– **Breakfast:** Smoothie bowl with spinach, protein powder, almond milk, topped with granola and sliced bananas.
– **Lunch:** Grilled chicken Caesar salad accented with Parmesan and croutons.
– **Dinner:** Baked tilapia served with wild rice and sautéed spinach.
– **Snack:** Mixed nuts.
**Success Tips:**
1. **Hydration:** Ensure you drink ample water throughout the day to promote digestion and overall health.
2. **Portion Control:** Be mindful of portion sizes to consume an appropriate protein amount without excessive eating.
3. **Variety:** Include diverse protein sources, such as animal and plant-based options, to achieve a balanced essential amino acid intake.
4. **Preparation:** Organize and prepare meals ahead of time to facilitate adherence to your diet.
Adhering to this 7-day high-protein meal plan can help fulfill your nutritional requirements while enjoying an assortment of appetizing and fulfilling meals. Modify portion sizes and ingredients as necessary to suit your dietary preferences and objectives.
Homemade Cast-Iron Skillet Pizza Recipe
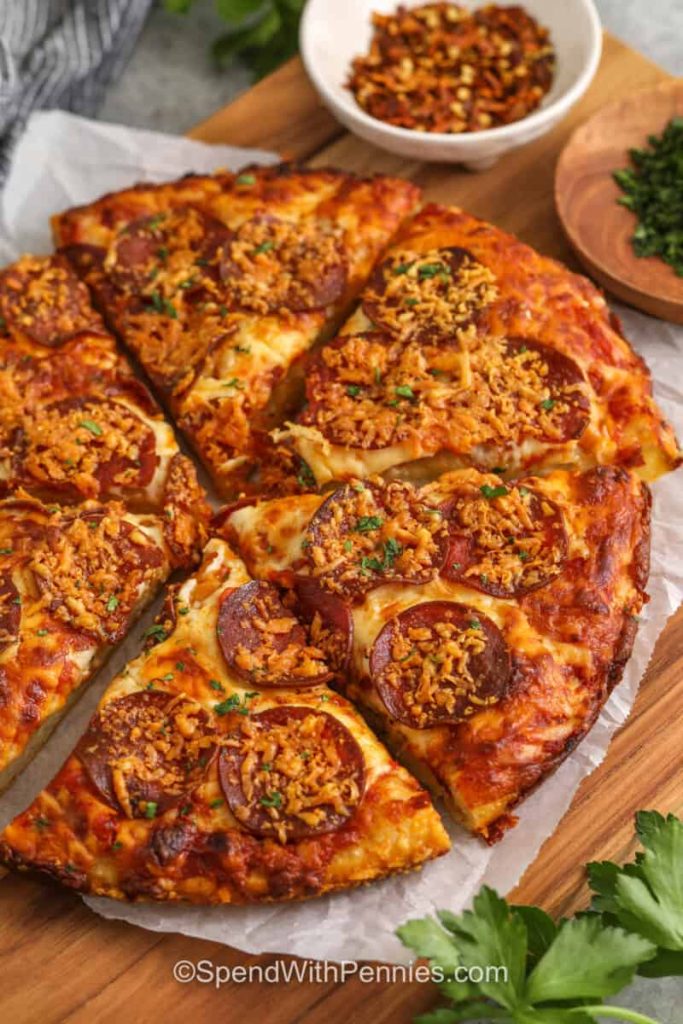
# Pan Pizza: A Homemade Treat
This **Pan Pizza** comes out with a crunchy golden crust, gooey mozzarella, and an abundance of flavorful pepperoni in each bite. Made in a cast-iron skillet, it’s a *quick homemade classic* that’s ideal for pizza night.
## Holly’s Recipe Highlights: Pan Pizza
**Taste**: Indulgent and cheesy with a buttery, crunchy crust, zesty pizza sauce, and flavorful pepperoni in every bite.
**Why Make It**: This cast-iron pan pizza is great for a hassle-free pizza night featuring a thick, crispy crust. It delivers all the taste of takeout, minus the inconvenience of a full sheet pan or delivery.
**Serving Suggestions**: Pair with a [classic Caesar salad](https://www.spendwithpennies.com/caesar-salad/), an [easy Italian salad](https://www.spendwithpennies.com/easy-italian-salad/), or your favorite vegetable side dish.
**Total Time**: 50 Mins
**Servings**: 4
**Cooking Method**: Baked
## Ingredient Notes for Pan Pizza
– **Pizza Dough**: For the finest pizza crust, use a 10 to 12-ounce ball of [homemade pizza dough](https://www.spendwithpennies.com/the-best-homemade-pizza-dough-recipe/) in a 10-inch skillet, allowing it to rest if it’s cold for easier stretching.
– **Oil**: Olive oil is key to achieving that golden, crispy, nearly fried pizza crust, so ensure you adequately coat the bottom and sides of your skillet.
– **Pizza Sauce**: Opt for a thicker [homemade pizza sauce](https://www.spendwithpennies.com/homemade-pizza-sauce/) to keep your crust crisp and prevent sogginess, applying just a light layer for perfect dough baking.
– **Cheese**: Low-moisture, shredded fresh mozzarella is ideal due to its superb melting quality and ability to prevent the pan pizza from becoming watery on top. Alternatively, you could use provolone or an Italian blend.
– **Pepperoni**: Pepperoni is a traditional topping that adds immense flavor, though you can omit it if you prefer a straightforward cheesy pan pizza.
– **Variations**:
– Feel free to substitute pepperoni with cooked sausage, mushrooms, olives, bell peppers, or jalapeños.
– Use pesto, white sauce, or crushed tomatoes in place of pizza sauce.
– Top it off with red pepper flakes, fresh basil, or [homemade Italian seasoning](https://www.spendwithpennies.com/homemade-italian-seasoning-recipe) for added flavor.
## How to Prepare a Pan Pizza
1. Stretch or roll the pizza dough and set it in an oiled skillet. Allow it to rise.
2. Spread the pizza sauce over the dough.
3. Add shredded mozzarella on top.
4. Follow with pepperoni and parmesan cheese, then bake.
### Tips for Perfect Pan Pizza
– **Keep the Dough Warm**: Allow the dough to rest in a warm environment or at room temperature so it relaxes and is easier to press into the skillet.
– **Allow the Dough to Rise**: If the dough continues to shrink back, let it rest for 5 to 10 minutes and press it again.
– **For Crispy Edges**: Sprinkle a bit of mozzarella closer to the edges of the pan.
– **Check the Bottom**: Use a spatula to examine near the end of baking. If the top is finished but the crust requires more color, an additional minute or two on the stovetop can help.
– **Let the Pizza Rest**: Allow it to rest for a couple of minutes before slicing so the cheese settles and the crust remains intact.
## Save Every Slice
Store leftovers in an airtight container in the refrigerator for up to 4 days and in the freezer for up to 2 months. Reheat in a skillet over low heat or in a hot oven or air fryer to restore the crisp crust.
### Pizza Night Favorites
Did you like this Pan Pizza Recipe? Leave a comment and rating below.

Pizza Burgers: A Tasty Combination of Two Beloved Dishes
### Pizza Burgers: A Family Favorite
These pizza burgers are a beloved choice for the family! Incredibly simple to prepare, adored by my kids, and just plain fun to make. They are also excellent for meal prepping, making them an ideal option for busy households.
#### A Nostalgic Recipe
The idea for pizza burgers stems from a treasured childhood memory. A toasted English muffin smeared with garlic butter, topped with a rich meat sauce and gooey cheese evokes warm feelings of family get-togethers. This recipe is a wonderful partnership between my grandma and me, merging her classic English muffin foundation with my taste for ground Italian sausage or turkey, all elevated by garlic butter.
#### Why We Love Pizza Burgers
1. **Incredibly Simple**: The process is easy, making it a perfect recipe for hectic weeknights.
2. **Child-Friendly**: My kids adore these pizza burgers, making them a favorite at mealtime.
3. **Flexible Toppings**: You can incorporate fun toppings like pepperoncini to match your family’s preferences.
4. **Freezer-Friendly**: They can be taken from the freezer and reheated one at a time, ideal for quick meals amidst activities.
#### How To Make Pizza Burgers
1. **Prepare Your Filling**: You can use ground beef, but I lean towards Italian sausage or well-seasoned ground turkey for extra taste.
2. **Brush with Garlic Butter**: This step significantly boosts the flavor.
3. **Top the English Muffins**: Scoop on some sauce, your choice of additions, and a sprinkle of cheese.
4. **Air Fry**: These can be air-fried directly from fresh or frozen, yielding a delectably crisp and golden brown finish.
5. **Savor**: Serve with a drizzle of olive oil and a sprinkle of Italian seasoning for an added flavor kick.
#### Ingredients
– **Meat Filling**: Ground Italian sausage or turkey, garlic powder, onion powder, Italian seasoning, salt, and tomato sauce.
– **English Muffins and Toppings**: English muffins, garlic butter, mozzarella cheese, and optional toppings like pepperoncini.
#### Cooking Instructions
1. **Prepare the Filling**: Heat oil in a large skillet, brown the meat, then add seasonings and tomato sauce. Stir in cheese and take off the heat.
2. **Prepare the English Muffins**: Combine melted butter with garlic and brush it over the muffins.
3. **Assemble the Pizza Burgers**: Spoon the meat mixture onto the muffins, top with cheese, and bake or air fry until golden.
4. **Freezing Instructions**: For future use, freeze individual pizza burgers on a parchment-lined plate, then move to a bag once firm.
5. **Reheating**: Air fry at 350°F for 6-8 minutes for a crisp exterior.
#### Conclusion
Pizza burgers are more than just a dish; they are a sentimental reminder of family customs and a delightful way to unite everyone. With their simple preparation and customizable aspects, they are bound to become a favorite in your home as well. Enjoy this charming recipe that connects generations and satisfies cravings!
Quinoa Risotto: A Protein-Packed Substitute for Classic Rice Risotto
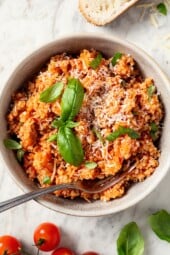
**Quinoa Risotto: A Protein-Packed Substitute for Classic Rice Risotto**
Recently, quinoa has gained popularity as a notable superfood, known for its remarkable nutritional benefits and flexibility in cooking. An inventive way to add quinoa to your meals is to use it as the foundation for risotto, a traditional Italian recipe typically prepared with arborio rice. Quinoa risotto provides a protein-rich option that not only appeals to those pursuing a healthier lifestyle but also delivers an enjoyable culinary experience.
**Nutritional Advantages of Quinoa**
Quinoa is commonly called a “pseudo-grain” since it is actually a seed, yet it is prepared and eaten like a grain. One of its key attributes is its high protein level. Unlike many plant foods, quinoa is a complete protein, containing all nine essential amino acids that our bodies cannot generate independently. This makes it an ideal choice for vegetarians, vegans, and anyone aiming to enhance their protein consumption.
Besides protein, quinoa is abundant in dietary fiber, which supports digestion and helps maintain a healthy weight by creating a sense of fullness. It is also an excellent source of vital nutrients such as magnesium, iron, and B vitamins, which are essential for energy production and overall well-being. Moreover, quinoa is gluten-free, making it appropriate for individuals with gluten sensitivities or celiac disease.
**Why Select Quinoa Risotto?**
Classic risotto is adored for its creamy consistency and rich flavor, achieved by slowly cooking arborio rice and gradually incorporating broth. While tasty, it can be high in carbohydrates and calories. Quinoa risotto, conversely, provides a lighter, more nutritious choice without compromising on taste or texture.
The nutty taste of quinoa complements a diverse range of ingredients, allowing for limitless customization. Whether you enjoy a traditional mushroom risotto or a bolder version with seasonal vegetables and herbs, quinoa establishes a sturdy base that absorbs flavors effectively.
**How to Prepare Quinoa Risotto**
Creating quinoa risotto is a simple process that parallels the conventional method. Here’s an easy recipe to help you begin:
**Ingredients:**
– 1 cup quinoa, rinsed
– 4 cups vegetable or chicken broth
– 1 small onion, finely diced
– 2 cloves garlic, minced
– 1 cup mushrooms, sliced
– 1 cup spinach or kale, chopped
– 1/4 cup grated Parmesan cheese (optional for a non-vegan version)
– 2 tablespoons olive oil
– Salt and pepper to taste
– Fresh herbs (like parsley or thyme) for garnish
**Instructions:**
1. In a large skillet, warm olive oil over medium heat. Add the onion and garlic, sautéing until the onion is translucent.
2. Incorporate the mushrooms and cook until tender.
3. Mix in the quinoa, allowing it to toast slightly for about 2 minutes.
4. Start adding the broth, one cup at a time, stirring often. Let the quinoa absorb most of the liquid before adding more.
5. Keep this up until the quinoa is fully cooked and achieves a creamy texture, around 20-25 minutes.
6. Stir in the spinach or kale, allowing it to wilt.
7. If applicable, add the Parmesan cheese and stir until melted and thoroughly mixed.
8. Season with salt and pepper according to your taste.
9. Garnish with fresh herbs before serving.
**Conclusion**
Quinoa risotto is a tasty and nutritious alternative to classic rice risotto, offering a protein-rich dish that is both fulfilling and health-conscious. Its versatility allows for inventive culinary expression, making it an ideal recipe for any occasion. Whether you want to elevate your protein intake or simply experiment with something new, quinoa risotto is a delightful option that promises to delight both the taste buds and the body.

Easy 4-Component Banana Bread Recipe
### The Wanderlust Kitchen: A Culinary Odyssey Across Continents
In a realm where gastronomic customs and travel adventures converge, The Wanderlust Kitchen emerges as a dynamic hub that honors the craft of cooking and discovery. Established by Linda, this distinctive space invites culinary lovers and wanderers to embark on a flavorful expedition that knows no boundaries.
#### A Blend of Recipes and Journey
At The Wanderlust Kitchen, the soul of every recipe is grounded in authenticity, respecting culinary heritage while integrating contemporary cooking techniques. Linda curates a wide variety of recipes that showcase the diverse mosaic of world cuisines. From the zesty street fare of Southeast Asia to the heartwarming meals from Mediterranean households, each recipe serves as a ticket to a novel locale.
#### Cooking with Assurance
A fundamental belief of The Wanderlust Kitchen is to cultivate assurance in home chefs. Linda asserts that anyone can whip up delightful meals when provided with the right direction and motivation. Every recipe is carefully designed, featuring straightforward instructions and suggestions that empower cooks of any expertise to experiment with fresh dishes. This methodology removes the mystique of cooking, rendering it approachable and enjoyable for all.
#### Honoring Culinary Heritage
Food tells compelling stories, and The Wanderlust Kitchen embraces this narrative by honoring the heritage behind every dish. Linda elucidates the cultural importance of ingredients and culinary practices, offering context that enhances the cooking experience. By appreciating the history and customs tied to each recipe, home chefs can connect with their meals on a richer level.
#### Contemporary Techniques and Ingredients
While revering traditional recipes, The Wanderlust Kitchen also adopts modern culinary advancements. Linda incorporates innovative techniques and ingredients that boost flavors and simplify the cooking journey. This blend of tradition and modernity sparks creativity in the kitchen, motivating cooks to modify and personalize recipes to suit their preferred tastes.
#### An Exciting Journey Awaits
The Wanderlust Kitchen is more than just a cooking platform; it’s a journey of excitement. Linda motivates her audience to step beyond their comfort zones, whether that involves trying out a new recipe or visiting a fresh destination. Each recipe acts as a portal to a unique culture, inviting cooks to savor the world through their palates.
#### Building Community and Bonds
Beyond just recipes, The Wanderlust Kitchen nurtures a sense of community among food enthusiasts and travelers. Linda connects with her followers through social media, sharing insights, tales, and experiences that spark connectivity. This engaging platform allows readers to showcase their own culinary journeys, forming a lively community of like-minded individuals who share a passion for food and exploration.
#### In Conclusion
The Wanderlust Kitchen transcends being merely a recipe collection; it is a tribute to global cuisines and the delight of cooking. With Linda as your companion, you’re invited to discover new flavors, appreciate culinary traditions, and embark on adventures that nourish both body and spirit. So, whether you’re aiming to create a heartwarming dish from your past or explore a daring new taste, The Wanderlust Kitchen is your ideal hub for culinary inspiration. Bon Appétit! Bon Voyage!

High Protein Nutrition Plan for 7 Days
**7-Day High Protein Meal Plan**
A high-protein meal plan can effectively aid in muscle development, weight management, and overall well-being. Proteins are vital macronutrients that assist in tissue formation and repair, enzyme and hormone synthesis, and immune system support. Below is a 7-day high-protein meal plan curated to offer you healthy and mouthwatering meals abundant in protein.
**Day 1:**
– **Breakfast:** Eggs scrambled with spinach and feta cheese, accompanied by a side of smoked salmon.
– **Lunch:** Salad of grilled chicken breast with mixed greens, cherry tomatoes, cucumber, and balsamic vinaigrette.
– **Dinner:** Cod baked with a lemon herb crust, complemented by quinoa and steamed broccoli.
– **Snack:** Greek yogurt paired with almonds and berries.
**Day 2:**
– **Breakfast:** Smoothie packed with whey protein, banana, almond milk, and a tablespoon of peanut butter.
– **Lunch:** Wrap with turkey and avocado using a whole grain tortilla, lettuce, and tomato.
– **Dinner:** Beef stir-fry featuring bell peppers, broccoli, and snap peas served atop brown rice.
– **Snack:** Cottage cheese with chunks of pineapple.
**Day 3:**
– **Breakfast:** Omelet filled with mushrooms, bell peppers, and cheddar cheese.
– **Lunch:** Lentil soup containing diced chicken served with whole-grain bread on the side.
– **Dinner:** Salmon grilled with asparagus alongside a quinoa salad.
– **Snack:** Hard-boiled eggs.
**Day 4:**
– **Breakfast:** Overnight oats mixed with chia seeds, protein powder, and assorted berries.
– **Lunch:** Chickpea tuna salad with red onion and lemon-tahini dressing.
– **Dinner:** Pork tenderloin served with roasted sweet potatoes and green beans.
– **Snack:** Edamame.
**Day 5:**
– **Breakfast:** Whole grain toast topped with avocado and poached eggs.
– **Lunch:** Salad of quinoa and black beans mixed with corn, cilantro, and lime dressing.
– **Dinner:** Chicken stir-fry featuring cashews, snow peas, and carrots served over jasmine rice.
– **Snack:** Protein bar.
**Day 6:**
– **Breakfast:** Pancakes made with protein powder, topped with fresh fruit and a scoop of Greek yogurt.
– **Lunch:** Salad of shrimp and avocado with mixed greens and a citrus vinaigrette.
– **Dinner:** Turkey meatballs in marinara sauce served with whole wheat spaghetti.
– **Snack:** Hummus alongside carrot and celery sticks.
**Day 7:**
– **Breakfast:** Smoothie bowl with spinach, protein powder, almond milk, topped with granola and sliced bananas.
– **Lunch:** Grilled chicken Caesar salad accented with Parmesan and croutons.
– **Dinner:** Baked tilapia served with wild rice and sautéed spinach.
– **Snack:** Mixed nuts.
**Success Tips:**
1. **Hydration:** Ensure you drink ample water throughout the day to promote digestion and overall health.
2. **Portion Control:** Be mindful of portion sizes to consume an appropriate protein amount without excessive eating.
3. **Variety:** Include diverse protein sources, such as animal and plant-based options, to achieve a balanced essential amino acid intake.
4. **Preparation:** Organize and prepare meals ahead of time to facilitate adherence to your diet.
Adhering to this 7-day high-protein meal plan can help fulfill your nutritional requirements while enjoying an assortment of appetizing and fulfilling meals. Modify portion sizes and ingredients as necessary to suit your dietary preferences and objectives.
Read More
Homemade Cast-Iron Skillet Pizza Recipe
# Pan Pizza: A Homemade Treat
This **Pan Pizza** comes out with a crunchy golden crust, gooey mozzarella, and an abundance of flavorful pepperoni in each bite. Made in a cast-iron skillet, it’s a *quick homemade classic* that’s ideal for pizza night.
## Holly’s Recipe Highlights: Pan Pizza
**Taste**: Indulgent and cheesy with a buttery, crunchy crust, zesty pizza sauce, and flavorful pepperoni in every bite.
**Why Make It**: This cast-iron pan pizza is great for a hassle-free pizza night featuring a thick, crispy crust. It delivers all the taste of takeout, minus the inconvenience of a full sheet pan or delivery.
**Serving Suggestions**: Pair with a [classic Caesar salad](https://www.spendwithpennies.com/caesar-salad/), an [easy Italian salad](https://www.spendwithpennies.com/easy-italian-salad/), or your favorite vegetable side dish.
**Total Time**: 50 Mins
**Servings**: 4
**Cooking Method**: Baked
## Ingredient Notes for Pan Pizza
– **Pizza Dough**: For the finest pizza crust, use a 10 to 12-ounce ball of [homemade pizza dough](https://www.spendwithpennies.com/the-best-homemade-pizza-dough-recipe/) in a 10-inch skillet, allowing it to rest if it’s cold for easier stretching.
– **Oil**: Olive oil is key to achieving that golden, crispy, nearly fried pizza crust, so ensure you adequately coat the bottom and sides of your skillet.
– **Pizza Sauce**: Opt for a thicker [homemade pizza sauce](https://www.spendwithpennies.com/homemade-pizza-sauce/) to keep your crust crisp and prevent sogginess, applying just a light layer for perfect dough baking.
– **Cheese**: Low-moisture, shredded fresh mozzarella is ideal due to its superb melting quality and ability to prevent the pan pizza from becoming watery on top. Alternatively, you could use provolone or an Italian blend.
– **Pepperoni**: Pepperoni is a traditional topping that adds immense flavor, though you can omit it if you prefer a straightforward cheesy pan pizza.
– **Variations**:
– Feel free to substitute pepperoni with cooked sausage, mushrooms, olives, bell peppers, or jalapeños.
– Use pesto, white sauce, or crushed tomatoes in place of pizza sauce.
– Top it off with red pepper flakes, fresh basil, or [homemade Italian seasoning](https://www.spendwithpennies.com/homemade-italian-seasoning-recipe) for added flavor.
## How to Prepare a Pan Pizza
1. Stretch or roll the pizza dough and set it in an oiled skillet. Allow it to rise.
2. Spread the pizza sauce over the dough.
3. Add shredded mozzarella on top.
4. Follow with pepperoni and parmesan cheese, then bake.
### Tips for Perfect Pan Pizza
– **Keep the Dough Warm**: Allow the dough to rest in a warm environment or at room temperature so it relaxes and is easier to press into the skillet.
– **Allow the Dough to Rise**: If the dough continues to shrink back, let it rest for 5 to 10 minutes and press it again.
– **For Crispy Edges**: Sprinkle a bit of mozzarella closer to the edges of the pan.
– **Check the Bottom**: Use a spatula to examine near the end of baking. If the top is finished but the crust requires more color, an additional minute or two on the stovetop can help.
– **Let the Pizza Rest**: Allow it to rest for a couple of minutes before slicing so the cheese settles and the crust remains intact.
## Save Every Slice
Store leftovers in an airtight container in the refrigerator for up to 4 days and in the freezer for up to 2 months. Reheat in a skillet over low heat or in a hot oven or air fryer to restore the crisp crust.
### Pizza Night Favorites
Did you like this Pan Pizza Recipe? Leave a comment and rating below.
Read More
Pizza Burgers: A Tasty Combination of Two Beloved Dishes
### Pizza Burgers: A Family Favorite
These pizza burgers are a beloved choice for the family! Incredibly simple to prepare, adored by my kids, and just plain fun to make. They are also excellent for meal prepping, making them an ideal option for busy households.
#### A Nostalgic Recipe
The idea for pizza burgers stems from a treasured childhood memory. A toasted English muffin smeared with garlic butter, topped with a rich meat sauce and gooey cheese evokes warm feelings of family get-togethers. This recipe is a wonderful partnership between my grandma and me, merging her classic English muffin foundation with my taste for ground Italian sausage or turkey, all elevated by garlic butter.
#### Why We Love Pizza Burgers
1. **Incredibly Simple**: The process is easy, making it a perfect recipe for hectic weeknights.
2. **Child-Friendly**: My kids adore these pizza burgers, making them a favorite at mealtime.
3. **Flexible Toppings**: You can incorporate fun toppings like pepperoncini to match your family’s preferences.
4. **Freezer-Friendly**: They can be taken from the freezer and reheated one at a time, ideal for quick meals amidst activities.
#### How To Make Pizza Burgers
1. **Prepare Your Filling**: You can use ground beef, but I lean towards Italian sausage or well-seasoned ground turkey for extra taste.
2. **Brush with Garlic Butter**: This step significantly boosts the flavor.
3. **Top the English Muffins**: Scoop on some sauce, your choice of additions, and a sprinkle of cheese.
4. **Air Fry**: These can be air-fried directly from fresh or frozen, yielding a delectably crisp and golden brown finish.
5. **Savor**: Serve with a drizzle of olive oil and a sprinkle of Italian seasoning for an added flavor kick.
#### Ingredients
– **Meat Filling**: Ground Italian sausage or turkey, garlic powder, onion powder, Italian seasoning, salt, and tomato sauce.
– **English Muffins and Toppings**: English muffins, garlic butter, mozzarella cheese, and optional toppings like pepperoncini.
#### Cooking Instructions
1. **Prepare the Filling**: Heat oil in a large skillet, brown the meat, then add seasonings and tomato sauce. Stir in cheese and take off the heat.
2. **Prepare the English Muffins**: Combine melted butter with garlic and brush it over the muffins.
3. **Assemble the Pizza Burgers**: Spoon the meat mixture onto the muffins, top with cheese, and bake or air fry until golden.
4. **Freezing Instructions**: For future use, freeze individual pizza burgers on a parchment-lined plate, then move to a bag once firm.
5. **Reheating**: Air fry at 350°F for 6-8 minutes for a crisp exterior.
#### Conclusion
Pizza burgers are more than just a dish; they are a sentimental reminder of family customs and a delightful way to unite everyone. With their simple preparation and customizable aspects, they are bound to become a favorite in your home as well. Enjoy this charming recipe that connects generations and satisfies cravings!
Read More Quinoa Risotto: A Protein-Packed Substitute for Classic Rice Risotto
**Quinoa Risotto: A Protein-Packed Substitute for Classic Rice Risotto**
Recently, quinoa has gained popularity as a notable superfood, known for its remarkable nutritional benefits and flexibility in cooking. An inventive way to add quinoa to your meals is to use it as the foundation for risotto, a traditional Italian recipe typically prepared with arborio rice. Quinoa risotto provides a protein-rich option that not only appeals to those pursuing a healthier lifestyle but also delivers an enjoyable culinary experience.
**Nutritional Advantages of Quinoa**
Quinoa is commonly called a “pseudo-grain” since it is actually a seed, yet it is prepared and eaten like a grain. One of its key attributes is its high protein level. Unlike many plant foods, quinoa is a complete protein, containing all nine essential amino acids that our bodies cannot generate independently. This makes it an ideal choice for vegetarians, vegans, and anyone aiming to enhance their protein consumption.
Besides protein, quinoa is abundant in dietary fiber, which supports digestion and helps maintain a healthy weight by creating a sense of fullness. It is also an excellent source of vital nutrients such as magnesium, iron, and B vitamins, which are essential for energy production and overall well-being. Moreover, quinoa is gluten-free, making it appropriate for individuals with gluten sensitivities or celiac disease.
**Why Select Quinoa Risotto?**
Classic risotto is adored for its creamy consistency and rich flavor, achieved by slowly cooking arborio rice and gradually incorporating broth. While tasty, it can be high in carbohydrates and calories. Quinoa risotto, conversely, provides a lighter, more nutritious choice without compromising on taste or texture.
The nutty taste of quinoa complements a diverse range of ingredients, allowing for limitless customization. Whether you enjoy a traditional mushroom risotto or a bolder version with seasonal vegetables and herbs, quinoa establishes a sturdy base that absorbs flavors effectively.
**How to Prepare Quinoa Risotto**
Creating quinoa risotto is a simple process that parallels the conventional method. Here’s an easy recipe to help you begin:
**Ingredients:**
– 1 cup quinoa, rinsed
– 4 cups vegetable or chicken broth
– 1 small onion, finely diced
– 2 cloves garlic, minced
– 1 cup mushrooms, sliced
– 1 cup spinach or kale, chopped
– 1/4 cup grated Parmesan cheese (optional for a non-vegan version)
– 2 tablespoons olive oil
– Salt and pepper to taste
– Fresh herbs (like parsley or thyme) for garnish
**Instructions:**
1. In a large skillet, warm olive oil over medium heat. Add the onion and garlic, sautéing until the onion is translucent.
2. Incorporate the mushrooms and cook until tender.
3. Mix in the quinoa, allowing it to toast slightly for about 2 minutes.
4. Start adding the broth, one cup at a time, stirring often. Let the quinoa absorb most of the liquid before adding more.
5. Keep this up until the quinoa is fully cooked and achieves a creamy texture, around 20-25 minutes.
6. Stir in the spinach or kale, allowing it to wilt.
7. If applicable, add the Parmesan cheese and stir until melted and thoroughly mixed.
8. Season with salt and pepper according to your taste.
9. Garnish with fresh herbs before serving.
**Conclusion**
Quinoa risotto is a tasty and nutritious alternative to classic rice risotto, offering a protein-rich dish that is both fulfilling and health-conscious. Its versatility allows for inventive culinary expression, making it an ideal recipe for any occasion. Whether you want to elevate your protein intake or simply experiment with something new, quinoa risotto is a delightful option that promises to delight both the taste buds and the body.
Read More
Easy 4-Component Banana Bread Recipe
### The Wanderlust Kitchen: A Culinary Odyssey Across Continents
In a realm where gastronomic customs and travel adventures converge, The Wanderlust Kitchen emerges as a dynamic hub that honors the craft of cooking and discovery. Established by Linda, this distinctive space invites culinary lovers and wanderers to embark on a flavorful expedition that knows no boundaries.
#### A Blend of Recipes and Journey
At The Wanderlust Kitchen, the soul of every recipe is grounded in authenticity, respecting culinary heritage while integrating contemporary cooking techniques. Linda curates a wide variety of recipes that showcase the diverse mosaic of world cuisines. From the zesty street fare of Southeast Asia to the heartwarming meals from Mediterranean households, each recipe serves as a ticket to a novel locale.
#### Cooking with Assurance
A fundamental belief of The Wanderlust Kitchen is to cultivate assurance in home chefs. Linda asserts that anyone can whip up delightful meals when provided with the right direction and motivation. Every recipe is carefully designed, featuring straightforward instructions and suggestions that empower cooks of any expertise to experiment with fresh dishes. This methodology removes the mystique of cooking, rendering it approachable and enjoyable for all.
#### Honoring Culinary Heritage
Food tells compelling stories, and The Wanderlust Kitchen embraces this narrative by honoring the heritage behind every dish. Linda elucidates the cultural importance of ingredients and culinary practices, offering context that enhances the cooking experience. By appreciating the history and customs tied to each recipe, home chefs can connect with their meals on a richer level.
#### Contemporary Techniques and Ingredients
While revering traditional recipes, The Wanderlust Kitchen also adopts modern culinary advancements. Linda incorporates innovative techniques and ingredients that boost flavors and simplify the cooking journey. This blend of tradition and modernity sparks creativity in the kitchen, motivating cooks to modify and personalize recipes to suit their preferred tastes.
#### An Exciting Journey Awaits
The Wanderlust Kitchen is more than just a cooking platform; it’s a journey of excitement. Linda motivates her audience to step beyond their comfort zones, whether that involves trying out a new recipe or visiting a fresh destination. Each recipe acts as a portal to a unique culture, inviting cooks to savor the world through their palates.
#### Building Community and Bonds
Beyond just recipes, The Wanderlust Kitchen nurtures a sense of community among food enthusiasts and travelers. Linda connects with her followers through social media, sharing insights, tales, and experiences that spark connectivity. This engaging platform allows readers to showcase their own culinary journeys, forming a lively community of like-minded individuals who share a passion for food and exploration.
#### In Conclusion
The Wanderlust Kitchen transcends being merely a recipe collection; it is a tribute to global cuisines and the delight of cooking. With Linda as your companion, you’re invited to discover new flavors, appreciate culinary traditions, and embark on adventures that nourish both body and spirit. So, whether you’re aiming to create a heartwarming dish from your past or explore a daring new taste, The Wanderlust Kitchen is your ideal hub for culinary inspiration. Bon Appétit! Bon Voyage!
Read More
An All-Inclusive Manual to Savory Fajita Tastes in an Easy Cheesy Casserole
# Chicken Fajita Casserole: A Warm All-in-One Meal
This Chicken Fajita Casserole is a warm, all-in-one meal that bakes up with juicy chicken, fluffy rice, and an abundance of vibrant Tex-Mex flavor. It’s filling, cheesy, and the type of hassle-free dish that makes hectic evenings much simpler, especially if you’re already a fan of easy chicken fajitas.
## Holly’s Recipe Highlights: Chicken Fajita Casserole
**Flavor**: Boldly flavored Tex-Mex essence with tangy salsa, creamy melted cheese, and a touch of sweetness from the peppers and onions.
**Why Make It**: I enjoy preparing this because everything cooks in a single dish, preparation is incredibly simple, and cleanup is just as manageable.
**Serving Suggestions**: Pair with a dollop of sour cream, homemade guacamole, fresh cilantro, easy pico de gallo, or a sprinkle of green onions for added flavor and freshness.
**Total Time**: 70 Mins
**Servings**: 6
**Cooking Method**: Baked
## Ingredient Notes
– **Rice**: Long-grain white rice is perfect as it cooks up fluffy and soft. Brown rice or instant rice won’t yield the same results in this casserole.
– **Salsa**: Opt for a salsa you like to flavor the casserole. Choose medium or mild for a family-friendly option, or hot for extra spice. Chunky salsa enhances heartiness.
– **Chicken**: Chicken tenderloins cook evenly, but if you opt for chicken breasts, slice them into ¾-inch strips for uniform cooking.
– **Seasoning**: Utilize store-bought fajita seasoning for ease, or create your own to manage salt and heat levels.
– **Onions & Peppers**: Frozen bell peppers and onions ease preparation. Freshly sliced can also be utilized, but frozen mixes blend in effortlessly and impart flavor as they cook.
– **Cheese**: A Mexican cheese blend melts nicely, but cheddar, Monterey Jack, or pepper jack are excellent substitutes.
– **Variations**:
– Incorporate black beans or corn for a more substantial Tex-Mex experience.
– Homemade salsa verde brings a brighter, tangier taste, and jalapeño slices on top can amp up the heat.
## How to Prepare a Chicken Fajita Casserole
1. Preheat oven to 375°F.
2. In a greased 9×13-inch baking dish, blend rice, chicken broth, salsa, salt, and pepper. Stir to mix.
3. Layer frozen peppers and onions over the rice mixture.
4. In a bowl, coat chicken with fajita seasoning until fully covered. Place chicken over the vegetables in a single layer.
5. Cover tightly with foil and bake for 1 hour or until rice is tender and chicken reaches an internal temperature of 165°F.
6. Remove cover, sprinkle cheese on top, and broil for 3 to 5 minutes until cheese is melted and bubbly. Let rest for 5 minutes before serving.
### Tips for Success
– **Cover the Dish**: Make sure it’s securely covered with foil to keep moisture in for the rice.
– **Cut Chicken Evenly**: Slice into uniform strips for consistent cooking.
– **Cooking to Perfection**: Verify the center for doneness as it cooks last.
– **Let it Rest**: Allow for resting time to let the rice absorb liquid and the casserole to set for easier serving.
## Save it For Later
Keep leftovers in an airtight container in the refrigerator for up to 4 days or in the freezer for up to 4 months. Reheat portions in the microwave or warm in the oven until thoroughly heated. For optimum texture, add fresh toppings after reheating.
### Fajita Night Favorites
Did you like this Chicken Fajita Casserole Recipe? Leave a comment and rating below.
Read More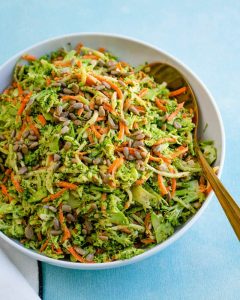
Crispy Broccoli Slaw Recipe
Simple Wholesome Recipes by Alex & Sonja
Introducing Alex and Sonja Overhiser, the vibrant pair behind the renowned food blog, A Couple Cooks. As authors of cookbooks, busy parents, and a real-life couple who enjoy cooking together, Alex and Sonja are devoted to sharing their enthusiasm for straightforward, seasonal, and nutritious recipes. Since 2010, they have inspired home cooks with innovative meal ideas, practical meal planning suggestions, and the pure joy of cooking.
The Evolution of A Couple Cooks
What started as a personal endeavor to document their culinary experiences has transformed into a cherished source for those looking for simple and healthy recipes. Alex and Sonja’s cooking philosophy is grounded in their dedication to utilizing fresh, seasonal ingredients to craft meals that are not only delightful but also healthful. Their recipes are tailored to accommodate the hectic lives of families, making healthy eating approachable and enjoyable for everyone.
Cooking Together as a Family
As parents, Alex and Sonja recognize the difficulties of preparing meals that please both adults and children. Their recipes are tested by their two kids, ensuring that every dish is family-friendly and approved by little ones. By involving their children in the cooking process, they encourage a passion for healthy eating and impart valuable life lessons. This family-focused approach is fundamental to their philosophy, highlighting the significance of cooking and dining together.
Straightforward and Seasonal Recipes
At the core of A Couple Cooks lies a compilation of recipes that honor the tastes of each season. From colorful spring salads to robust winter soups, Alex and Sonja’s meals showcase the finest produce throughout the year. Their emphasis on simplicity ensures that even beginner cooks can easily recreate these dishes, using ingredients that are commonly available and budget-friendly.
Health-Conscious Meal Planning Tips
Alongside their recipes, Alex and Sonja provide practical advice for meal planning and preparation. They recognize that a bit of planning can significantly aid in making healthy eating a consistent practice. Their suggestions encompass creating weekly meal plans, batch cooking, and creatively using leftovers. By sharing their tips, they empower others to take charge of their kitchens and make nutritious meals a regular feature of their lives.
The Delight of Cooking
Most importantly, Alex and Sonja champion the joy of cooking. Their blog serves as a testament to the happiness derived from preparing and sharing meals with loved ones. Through their recipes and narratives, they encourage others to find enjoyment in the kitchen and to embrace the journey of crafting something delicious and wholesome.
Whether you are an experienced cook or just embarking on your culinary adventure, A Couple Cooks provides a treasure trove of inspiration and direction. With Alex and Sonja’s easy wholesome recipes, you can reap the rewards of home-cooked meals that are both fulfilling and health-conscious. Immerse yourself in their realm of straightforward, seasonal cooking and uncover the joy of eating well.
Read More
Irish Mule Cocktail Recipe
**The Wanderlust Kitchen: A Culinary Expedition Across the Globe**
In a time when culinary discovery is more attainable than ever before, The Wanderlust Kitchen emerges as a guiding light for both food aficionados and travel enthusiasts. Established by Linda, this lively platform invites readers to join a culinary voyage that crosses boundaries and cultures. With a vibrant array of recipes and travel narratives, The Wanderlust Kitchen honors genuine food traditions blended with contemporary cooking methods.
### A Universe of Recipes
At the core of The Wanderlust Kitchen lies an extensive assortment of recipes that cater to diverse tastes and inclinations. Linda highlights the significance of authenticity, ensuring that every recipe embodies the true spirit of its cultural background. From age-old recipes inherited through generations to modern adaptations that use unique ingredients, there is something for everyone.
Whether you’re yearning for the cozy tastes of Italian pasta, the lively spices of Indian curries, or the subtle harmony of Japanese sushi, The Wanderlust Kitchen has a multitude of choices. Each recipe is meticulously crafted, providing straightforward directions and hints to guide home chefs of all experience levels towards achieving delicious outcomes.
### Honoring Culinary Traditions
One of the distinctive features of The Wanderlust Kitchen is its dedication to honoring culinary heritage. Linda holds the belief that food is a compelling storyteller, linking individuals to their origins and the cultures they represent. By sharing recipes that respect traditional cooking techniques and ingredients, she motivates readers to value the history and importance behind every dish.
This emphasis on heritage not only enriches the cooking journey but also nurtures a more profound appreciation for global cuisines. Readers are invited to delve into the narratives behind the recipes, uncovering the cultural relevance and local variations that lend each dish its individuality.
### Contemporary Techniques and Ingredients
While The Wanderlust Kitchen cherishes classic recipes, it also welcomes contemporary culinary methods and ingredients. Linda inspires her audience to be bold in the kitchen, trying out novel flavors and cooking techniques. This blend of tradition and modernity fosters creativity and innovation, turning cooking into an exhilarating and evolving endeavor.
From integrating plant-based substitutes to making use of advanced cooking tools, The Wanderlust Kitchen serves as a guide for those eager to enhance their culinary expertise. Linda’s approachable manner and passion for cooking motivate readers to venture beyond their usual boundaries and experiment with new ideas.
### Travel Experiences
Alongside its comprehensive recipe selection, The Wanderlust Kitchen also serves as a travel diary chronicling Linda’s global adventures. Each location she explores is paired with culinary insights, local food experiences, and traveler tips. This merging of culinary and travel experiences offers a well-rounded journey, enabling readers to not only cook but also envision exploring new destinations.
Linda’s travel narratives are rich with personal stories, cultural observations, and the delightful revelations that accompany tasting local dishes. These accounts deepen the recipes, offering context and inspiration for readers to start their own culinary escapades.
### Conclusion
The Wanderlust Kitchen transcends being merely a recipe blog; it is a tribute to food, culture, and exploration. Linda’s enthusiasm for cooking and travel radiates in each post, encouraging readers to discover the world through their palate. With a dedication to authenticity and an adventurous spirit, The Wanderlust Kitchen invites everyone to relish the joy of cooking and the excitement of travel. So, whether you’re aiming to create a new dish or plan your next adventure, The Wanderlust Kitchen is your definitive guide. Bon Appétit! Bon Voyage!
Read More
Banana Chocolate Chip Cake Instructions
### Banana Chocolate Chip Cake: A Tasty Variation on a Timeless Classic
As we commemorate almost twenty years since the debut of a cherished family recipe, the Chocolate Chip Sour Cream Cake, it’s the perfect moment to delve into a captivating twist that has enchanted palates: the Banana Chocolate Chip Cake. This scrumptious dessert merges the charm of the original cake with the sweet, comforting taste of ripe bananas, making it an ideal treat for any celebration.
#### The Inspiration for the Cake
The initial Chocolate Chip Sour Cream Cake is celebrated for its tall, plush texture and a lovely flaky layer of cinnamon sugar atop. Throughout the years, the idea of morphing this classic into a banana rendition lingered in the background. The goal was to craft a cake that not only preserves the essence of the original but also embraces the inherent sweetness and moisture of bananas. After some recipe experimentation, the outcome was a cake that swiftly became a family favorite, demonstrating that sometimes, change is truly beneficial.
#### Reasons to Adore This Cake
This Banana Chocolate Chip Cake is not only straightforward to prepare but also incredibly adaptable. It maintains the moistness and rich flavor of the original cake while adding a new layer of warmth and aroma from the bananas. The inclusion of chocolate chips and a cinnamon-sugar topping further enhances it, making it a delightful indulgence for breakfast, dessert, or whenever you desire something sweet.
#### Recipe Snapshot
**Ingredients:**
**For the Cake:**
– 3 large eggs, separated
– ½ cup (4 ounces or 115 grams) unsalted butter, at room temperature
– 1½ cups (300 grams) granulated sugar
– 1½ teaspoons vanilla extract
– 1½ cups (375 grams) mashed bananas
– ⅔ cup (160 grams) sour cream
– 3 cups (400 grams) all-purpose flour
– ½ teaspoon ground cinnamon
– 1 teaspoon baking powder
– 1½ teaspoons baking soda
– 1½ teaspoons kosher salt
**For the Filling and Topping:**
– 2 cups (12 ounces or 340 grams) semi- or bittersweet chocolate chips
– ½ cup (100 grams) granulated sugar
– 1 teaspoon ground cinnamon
#### Directions:
1. **Preheat the Oven:** Set your oven to 350°F (175°C). Prepare a 9×13-inch baking dish by greasing it with nonstick spray and lining the bottom with parchment paper.
2. **Prepare the Batter:**
– In a large bowl, whisk the egg whites until they form stiff peaks and set aside.
– In another bowl, cream the butter and 1½ cups of granulated sugar until light and fluffy. Incorporate the egg yolks and vanilla, mixing until well combined.
– In a separate bowl, combine the flour, baking soda, baking powder, ½ teaspoon of cinnamon, and salt.
– Fold the mashed bananas into the butter mixture and mix thoroughly. Gradually add half of the flour mixture, then incorporate the sour cream, and finally mix in the remaining flour mixture, beating until just blended. Carefully fold in the beaten egg whites.
3. **Build the Cake:**
– In a small bowl, mix the remaining ½ cup of sugar with 1 teaspoon of cinnamon.
– Pour half of the batter into the prepared dish. Sprinkle half of the cinnamon-sugar blend and 1 cup of chocolate chips on top. Add the remaining batter over the filling and smooth the surface. Conclude by sprinkling the remaining cinnamon-sugar and chocolate chips over the top.
4. **Bake the Cake:** Bake for 35 to 40 minutes, or until a toothpick inserted into the center comes out clean. Let the cake cool in the pan.
5. **Serve:** Move the cake to a cutting board and slice into squares. For optimal results, keep the cake at room temperature without covering it to maintain the flaky topping.
#### Conclusion
The Banana Chocolate Chip Cake represents a delightful transformation of a classic recipe, ideal for those wishing to make use of ripe bananas while enjoying a sweet delicacy. Its moist consistency, combined with the richness of chocolate and a dash of cinnamon, makes it an essential try for any dessert enthusiast. Savor this cake as a comforting dessert or a sweet complement to your breakfast spread.
Read More
Sidecar: An In-Depth Exploration of Its Background and Operational Features
### The Sidecar Cocktail: An Enduring Classic
The Sidecar is a cocktail that has withstood the test of time, enchanting drinkers ever since its creation in the early 20th century. With roots rich in anecdotal lore, this drink is as captivating as it is delightful. The Sidecar is frequently linked to the allure of the 1920s, a decade characterized by creativity and a rising cocktail scene.
#### Origins of the Sidecar
The precise beginnings of the Sidecar are enveloped in uncertainty, with numerous accounts competing for credibility. One well-known story indicates that an American army captain during World War I visited bars in Paris, arriving on a motorcycle equipped with a sidecar. This captain would order a drink crafted from cognac, orange liqueur, and lemon juice, eventually acquiring the name “Sidecar” due to his distinct mode of travel.
Another hypothesis suggests that bartenders used to spill leftover cocktail from the shaker into a small glass, which they also referred to as a sidecar. Regardless of its authentic origin, the Sidecar has emerged as a fundamental offering in cocktail bars worldwide.
#### Flavor Profile
The Sidecar is frequently referred to as the French counterpart of the margarita. It features a harmonious blend of bold, vibrant, and subtly sweet flavors. The foundation of the cocktail is cognac or brandy, establishing a sturdy base. The inclusion of fresh lemon juice imparts brightness, while orange liqueur, like Cointreau or triple sec, brings in a delicate sweetness.
Conventionally, the Sidecar is served with a sugared rim, providing an element of sparkle and visual attractiveness, though some might consider it unnecessary given the drink’s intrinsic sweetness.
#### Recipe for the Ideal Sidecar
To prepare your very own Sidecar, adhere to this straightforward recipe:
**Ingredients:**
– 1 ounce (30 ml) lemon juice, plus an additional wedge for a sugared rim
– Raw or turbinado sugar, for the rim (optional)
– 3 ounces (90 ml) cognac or brandy
– 1 ½ ounces (45 ml) Cointreau or triple sec
**Instructions:**
1. If you desire to sugar the rim of your glass, rub the rim with a lemon wedge and roll it in raw sugar.
2. In a cocktail shaker, combine the cognac, Cointreau, and lemon juice with ice. Shake well until the mixture is chilled.
3. Strain the cocktail into your prepared glass.
4. Savor your Sidecar!
#### Conclusion
The Sidecar is more than merely a cocktail; it represents a slice of history that demonstrates the progression of mixology. Its enchanting blend of flavors and stylish presentation make it a favorite among cocktail aficionados. Whether relished at an elegant bar or made at home, the Sidecar endures as an everlasting classic that continues to motivate and please. Cheers!
Read More